Quality Products

At a Fair Price

Wholesale Provider

Of Valves & Fittings

  • Corporate Office: 1301 Greengrass Drive Houston, TX 77008
  • 1-800-237-2512

Quality Products

At a Fair Price

Wholesale Provider

Of Valves & Fittings

7 Tips for Choosing the Right Plug Valves

Choosing a plug valve is rarely just a matter of matching pipe size and price. The valve must suit the process, operating conditions, and maintenance plan. Plug valves are used in many systems, but their designs and materials are not interchangeable. A choice that looks sound on a catalog page may perform poorly when the fluid contains solids or the line cycles frequently.

Small details matter. Consider the fluid’s composition, temperature, pressure, and potential for corrosion before comparing valve options. Port design affects flow, while seat and body materials influence sealing and service life. Actuation also deserves attention: a hand lever may suit an accessible line, but a remote installation could call for a different arrangement. Check connection dimensions and manufacturer specifications against the actual piping system. Fit comes first.

Experience in the field can reveal issues that a product description misses, such as limited clearance around a handle or difficult access for routine inspection. Still, no single design is best for every application. The seven tips in this guide help buyers assess compatibility, construction, operation, reliability, and long-term support without relying on price alone. Use them as a practical checklist, then confirm critical selections with current technical documents and a qualified valve professional. Some questions may remain. That is a reason to verify—not guess—before ordering.
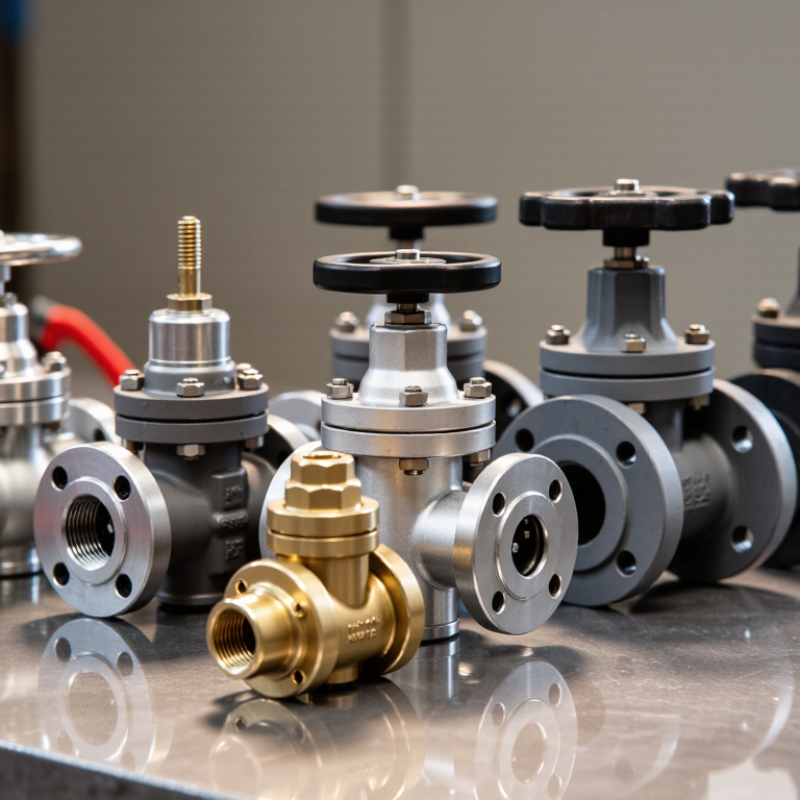
7 Tips for Choosing the Right Plug Valves

Select Plug Type and Port Size: Full-Port Bores Match Pipe Flow Area

When selecting a plug valve, compare the port opening with the pipe’s actual inside diameter—not just its nominal size. A full-port bore can preserve a flow area close to the pipe’s, reducing local restriction as fluid passes through the valve. For example, a pipe with a 52.5 mm internal diameter has a flow area of about 2,165 mm². A smaller port cuts that area and can increase velocity through the opening. Small difference, real effect.

Crane Technical Paper No. 410 explains how flow losses depend on velocity and fitting resistance; its methods help engineers estimate the pressure-drop effect of a valve in a specific system. API 6D also provides terminology and requirements relevant to full-bore pipeline valves. Use these references alongside the manufacturer’s certified dimensions, then check the valve against the pipe schedule, fluid, and operating conditions. A full port is not automatically the best choice: it may add weight or cost, and actual pressure loss depends on the complete installation. I’ve seen nominal sizes mislead a quick selection. Verify the bore drawing before specifying.

Full-Port Bore: Matching Pipe Flow Area

A full-port valve is designed with a bore that closely matches the adjoining pipe’s internal diameter, helping maintain its flow area. Values shown are calculated from Schedule 40 pipe dimensions using A = π × (ID ÷ 2)². Actual valve bore dimensions vary by design.

Pipe internal diameters are based on ASME B36.10M Schedule 40 dimensions; flow areas are calculated values.

Compare ASME B16.34 Class 150–2500 Pressure–Temperature Ratings

ASME B16.34 Class 150–2500 ratings are not simple pressure limits. The allowable pressure changes with temperature and material group. A Class 600 valve, for example, may have a different rating at ambient temperature than at elevated temperature. Check the pressure–temperature table for the exact body material and design temperature. Class numbers alone can mislead.

Compare the rating at your actual operating temperature, not just the maximum pressure shown on a datasheet. Include startup conditions, pressure surges, and any temperature swings. A valve handling hot steam needs a different check from one carrying cool water at the same pressure. Small details matter. Confirm that the valve’s end connections and construction also match the applicable B16.34 requirements; ratings can differ across material groups and configurations.

For a practical comparison, list each candidate’s class, body material, temperature, and corresponding allowable pressure side by side. Then check the required design conditions against that value, with suitable engineering review. Do not assume a higher class automatically solves every issue: seat materials, corrosion, and operating torque also affect suitability. Ratings are useful, but they do not tell the whole story. And tables can be easy to misread, especially when units or material groups differ.

7 Tips for Choosing the Right Plug Valves — Compare ASME B16.34 Class 150–2500 Pressure–Temperature Ratings
Tip What to Evaluate Practical Selection Guidance ASME B16.34 Rating Reference
1. Match the valve to the design conditions Maximum and minimum operating pressure and temperature, including credible excursions. Check the pressure–temperature rating for the selected pressure class, material group, and design temperature. Do not select by class number alone. For ASTM A105 carbon steel, Material Group 1.1, the standard rating at 100°F (38°C) is shown below as a representative comparison.
2. Compare pressure classes at a stated temperature Class 150, 300, 600, 900, 1500, or 2500 rating at the applicable temperature. At temperatures other than 100°F, use the applicable ASME B16.34 material-group table. Allowable pressure generally changes with temperature; do not extrapolate the figures below. Class 150: 285 psi (1.97 MPa)
Class 300: 740 psi (5.10 MPa)
Class 600: 1,480 psi (10.20 MPa)
Class 900: 2,220 psi (15.31 MPa)
Class 1500: 3,705 psi (25.55 MPa)
Class 2500: 6,170 psi (42.54 MPa)
3. Confirm the pressure boundary material Body, plug, stem, and other pressure-retaining materials, including the applicable material group. Verify the exact material specification and its ASME B16.34 rating table. Similar-looking alloys or different material groups may have different allowable ratings. The comparison figures in this table apply only to ASTM A105 carbon steel, Material Group 1.1, at 100°F.
4. Select the plug and seat arrangement for the service Lubricated, non-lubricated, sleeved, or lined design; media compatibility; shutoff and operating requirements. Check chemical compatibility, temperature limits, seat materials, torque, and the manufacturer’s stated operating limits. A body pressure class alone does not establish suitability for every service. ASME B16.34 pressure–temperature ratings address valve pressure-boundary ratings; they do not by themselves confirm seat performance or leakage class.
5. Account for the fluid and operating conditions Corrosion, erosion, solids, viscosity, cycling, pressure drop, and potential thermal or pressure transients. Choose materials and port configuration for the process. Review flow capacity and operating torque, especially for abrasive, dirty, or frequently cycled service. Use the rating for the actual design temperature and material. Confirm any additional limits imposed by the valve design or end connection.
6. Verify ends, dimensions, and applicable requirements Flanged, threaded, or welded ends; face-to-face dimensions; piping class; inspection and testing requirements. Check the applicable end-connection and dimensional standards, project specifications, and code requirements. Confirm that the complete assembly is suitable for the piping system. ASME B16.34 ratings should be checked together with the applicable requirements for the selected end connection and valve construction.
7. Check documentation and operating limits Material certificates, pressure testing, design documentation, temperature limits, and maintenance needs. Request documentation that identifies materials, pressure class, design temperature, test basis, and any service restrictions. Confirm suitability before installation. Use the current applicable edition of ASME B16.34 and the project’s governing code. The valve supplier should confirm the final pressure–temperature rating.
Rating note: The pressure figures are representative ASME B16.34 pressure ratings for ASTM A105 carbon steel, Material Group 1.1, at 100°F (38°C), not universal ratings for all plug valves or materials. Ratings vary by material group and temperature. Confirm the exact rating in the applicable edition of ASME B16.34 and verify the complete valve’s documented limits before selection.

Match Body, Plug, and Seat Materials to Media and Operating Conditions

A plug valve’s body, plug, and seat face different stresses, so matching only the body to the fluid can be a costly mistake. For water or mild chemicals, common metal bodies may be suitable, but acids, salts, and solvents can attack them quickly. Check the fluid’s concentration, temperature, and cleaning chemicals—not just its name. Small details matter.

The plug and seat must also work together. A polymer-lined plug may resist corrosion, while an elastomer seat can seal tightly; however, some solvents cause elastomers to swell or soften. For abrasive slurries or hotter service, a metal seat may tolerate wear better, though it can require more operating torque. There is no universal best combination. I would verify material compatibility against a supplier’s chemical-resistance data, then check pressure and temperature limits for the complete valve. If the process changes seasonally, test the full range. A neat chart can still miss real-world cycling. Inspecting a sample after service, where practical, can reveal wear or swelling that a specification sheet cannot predict.

Specify Inspection and Fire Tests: API 598 and API 607

A plug valve can look sound on the bench and still fail when its seat or body is stressed. API 598 sets inspection and pressure-test requirements, including shell and closure tests where applicable. Ask for the test records, not just a line on a datasheet. Check that the stated edition, valve size, pressure class, and test results match your purchase specification. Details matter.

API 607 addresses fire testing for applicable quarter-turn valves and valves with nonmetallic seats. It evaluates leakage and operability during and after a defined fire exposure. It is a type test, not proof that every valve shipped received a fire test. Request the report and confirm that its design, materials, seat arrangement, and size range cover the valve you are selecting. A changed seat material can matter. Do not assume it is interchangeable.

Tie both standards to the service conditions: fluid, pressure, temperature, and the consequences of leakage. Agree in advance on witnessing, documentation, and acceptance criteria. A common mistake is treating “API 607 tested” as a complete fire-safe guarantee for the installed system; piping, installation, and maintenance also affect performance. I would still review those details with the project engineer, especially when the valve will isolate critical equipment.

Verify End Connections, Actuation, and Design Against API 599

7 Tips for Choosing the Right Plug Valves

Tip: Verify the end connections before comparing prices. Match flange ratings, facing, and dimensions to the piping drawings. For threaded or welded ends, check the specified size and connection type. A valve that nearly fits is still a costly problem. Measure twice.

Tip: Treat actuation and valve design as separate checks. Estimate operating torque under expected pressure and temperature, then confirm the actuator can handle it with a suitable margin. Manual operation may work on a small line but become difficult after deposits build up. That detail is easy to overlook. Check the required opening and closing speed, too.

Tip: Review the valve’s design against the applicable edition of API 599 and the project specification. Confirm that the selected valve type, pressure class, materials, and testing requirements fit the service. API 599 alignment alone does not establish that an actuator is correctly sized or that every project requirement is met. Ask for the relevant documentation, and compare it with the purchase requirements. If a detail is unclear, pause and verify it rather than assuming the catalog description covers it.

Top
error: Content is protected !!