
Quality Products
At a Fair Price
Wholesale Provider
Of Valves & Fittings
- HOME
- Products
- Ball Valves
- Bull Plugs & Swages
- Butterfly Valves
- Check Valves
- Cushion / Flow Tees & Bleed Rings
- Enhanced Oil Recovery
- Floating Ball Valves
- Foot Valves
- Forged Steel Fittings
- Forged Steel Outlets
- Gaskets-Insulation Kits
- Gate Valves
- Gate, Globe & Check Valves
- Malleable Fittings
- Needle Valves
- Nipples
- Piston Valves
- Plug Valves
- Stainless Steel Flanges, Fittings & Nipples
- Strainers
- Studs
- Trunnion
- Unions
- Weld Fittings & Flanges
- Manufacturers
- Advance
- American Block
- Anvil
- Balon
- Bonney Forge
- Champion
- Clayton Mark
- Crane
- Daniel
- DMIC
- GMI
- Galli & Cassina
- Hackney-Ladish
- JMC
- Lone Star
- MATCO
- Marpac-McCanna
- National Flange
- National Gasket
- Nordstrom
- Nutron
- PPI
- SHARPE
- SMI
- TEXSTEAM
- TEX-THREAD
- Titan
- USA Fastner
- Vogt
- Weld Bend
- Westbrook
- Wheatley
- Williams
- WKM
- Wolar
- Locations
- Contact
- Blog
- Careers
- Get a Quote
- HOME
- Products
- Ball Valves
- Bull Plugs & Swages
- Butterfly Valves
- Check Valves
- Cushion / Flow Tees & Bleed Rings
- Enhanced Oil Recovery
- Floating Ball Valves
- Foot Valves
- Forged Steel Fittings
- Forged Steel Outlets
- Gaskets-Insulation Kits
- Gate Valves
- Gate, Globe & Check Valves
- Malleable Fittings
- Needle Valves
- Nipples
- Piston Valves
- Plug Valves
- Stainless Steel Flanges, Fittings & Nipples
- Strainers
- Studs
- Trunnion
- Unions
- Weld Fittings & Flanges
- Manufacturers
- Advance
- American Block
- Anvil
- Balon
- Bonney Forge
- Champion
- Clayton Mark
- Crane
- Daniel
- DMIC
- GMI
- Galli & Cassina
- Hackney-Ladish
- JMC
- Lone Star
- MATCO
- Marpac-McCanna
- National Flange
- National Gasket
- Nordstrom
- Nutron
- PPI
- SHARPE
- SMI
- TEXSTEAM
- TEX-THREAD
- Titan
- USA Fastner
- Vogt
- Weld Bend
- Westbrook
- Wheatley
- Williams
- WKM
- Wolar
- Locations
- Contact
- About
- Careers
- Get a Quote
7 Tips for Choosing Fiberglass Drill Bits
Fiberglass looks solid, yet its layered fibers can splinter when a drill bit cuts poorly. A clean hole depends on more than sharpness. Bit geometry, speed, pressure, and backing support all affect the laminate’s edge. One small mistake can leave pale fraying around the hole or hidden damage beneath the surface.
Composite-machining researcher Dr. Stephen Tsai has studied damage in fiber-reinforced materials. A practical paraphrase of that principle—not a direct quotation—is: “Protect the laminate; choose the bit and feed for the fibers.” That idea guides these seven tips for choosing Fiberglass Drill Bits. They cover bit material, cutting-edge design, diameter, operating speed, pressure, workpiece support, and signs of wear. Each choice matters at the bench. A sharp bit may still perform badly if it spins too fast or meets unsupported fiberglass.
The best choice depends on the laminate, the hole size, and the tool available. Check the manufacturer’s guidance, test on scrap when possible, and inspect both sides of the panel. Look for clean edges, not just a fast cut. Small details matter. Even careful advice has limits: fiberglass products vary, and one setup may not suit every panel. These tips offer a practical starting point, not a substitute for a controlled test.
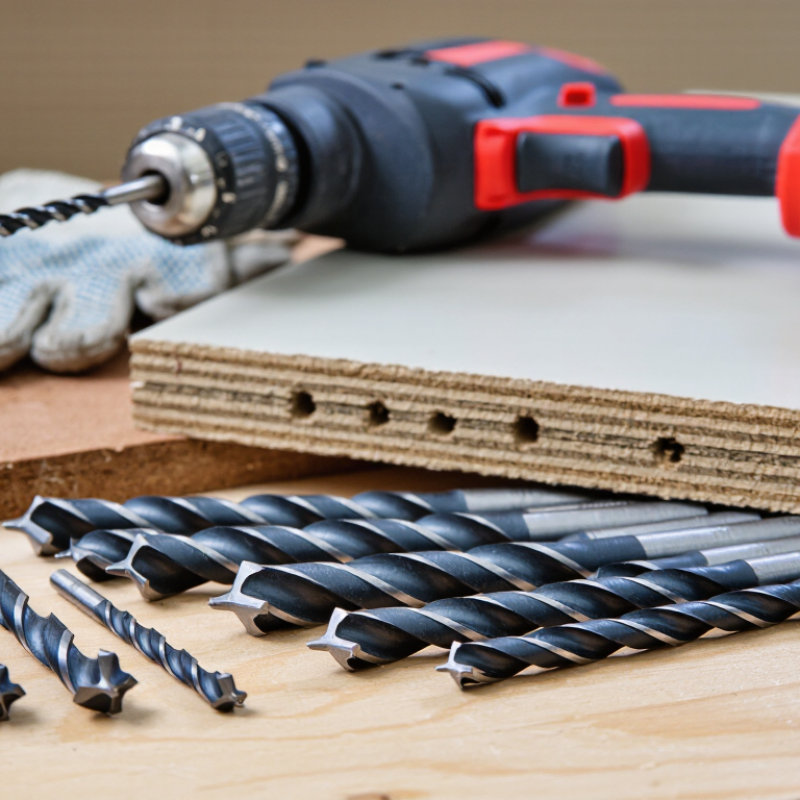
Understanding Fiberglass Drill Bits and Their Purpose
Fiberglass drill bits are designed to make clean holes in glass-fiber-reinforced plastic, a composite of strong fibers held in resin. The bit’s purpose is not simply to cut quickly. It must pass through abrasive fibers without pulling them from the surface or cracking the resin around the hole. A ragged edge can expose fibers and weaken the finished part. Small details matter.
Bit geometry and condition affect the result. A sharp carbide-tipped bit is often used for abrasive composites, while a dull edge can create excess heat and fraying. Use steady pressure, support the underside with a backing board, and clear dust as you work. Too much pressure may cause damage; too little can make the bit wander. The right balance takes practice.
Dust deserves attention, too. NIOSH’s Pocket Guide to Chemical Hazards lists a recommended exposure limit for fibrous glass of 3 fibers per cubic centimeter for fibers longer than 5 micrometers, with an aspect ratio of at least 3:1. It also lists 5 milligrams per cubic meter for total dust. These are occupational exposure guidelines, not drill-bit performance ratings, and drilling conditions vary. Local dust extraction and suitable eye and respiratory protection help reduce exposure. A clean-looking hole does not mean the air is clear.
Assessing Fiberglass Type, Thickness, and Drilling Requirements
Fiberglass varies more than its surface suggests. A woven cloth laminate may flex slightly, while a pultruded profile can be dense and rigid. Gelcoat adds a brittle outer layer that may chip before the bit reaches the reinforcing fibers. Check the panel edge, drawings, or a hidden area when possible. Small differences matter.
Thickness and hole size shape the drilling plan. Thin sheets can flex, so clamp them between sacrificial boards and use light pressure. A sharp, standard twist bit may suit small holes; carbide-tipped bits can last longer in abrasive laminates. For a large opening, a hole saw may be more suitable. Still, bit choice alone will not prevent splintering. Support the exit side, drill at a controlled speed, and ease off as the tip breaks through. I find this judgment easy to misread from appearance alone.
Match the method to the job. A few clearance holes need a different approach from repeated, close-tolerance holes or a deep cut near an edge. Test on an offcut of similar thickness, then inspect for fuzzy fibers, cracks, or heat discoloration. If the bit squeals or the resin smells hot, pause and reassess. Wear eye protection and a properly fitted particulate respirator; fiberglass dust can irritate skin and lungs. Clean with a suitable vacuum, not by brushing dust into the air.
7 Tips for Choosing Fiberglass Drill Bits - Assessing Fiberglass Type, Thickness, and Drilling Requirements
| Tip | Fiberglass or drilling condition | Bit choice | Practical guidance |
|---|---|---|---|
| 1. Identify the laminate | Glass-fiber-reinforced plastic (FRP), woven laminate, or a panel with a gelcoat surface | A sharp, standard twist drill bit made from high-speed steel (HSS) is suitable for occasional small holes; carbide-tipped bits can be useful for frequent work. | Check whether the panel has a surface coating or backing layer. These layers may need extra support to reduce chipping and splintering. |
| 2. Match the bit to the hole size | Small fastener holes versus larger openings for fittings or cable pass-throughs | Use a twist bit for small holes. For larger openings, use a hole saw suited to composite materials or a suitable diamond-grit tool. | Choose the hole diameter to match the fitting and its clearance requirements. Avoid forcing an oversized twist bit to make a large opening. |
| 3. Account for panel thickness | Thin sheet or a thicker, solid laminate | Select a bit with enough flute length to pass through the material, while keeping the bit diameter appropriate for the hole. | For thick panels, drill steadily and withdraw the bit periodically to clear dust and reduce heat buildup. Support the exit side where possible. |
| 4. Prioritize a sharp cutting edge | Any fiberglass laminate, especially when clean hole edges matter | Use a sharp bit designed for cutting, not a dull or damaged bit. | A dull bit can rub instead of cutting, increasing heat and the risk of rough edges. Replace or properly resharpen worn bits. |
| 5. Reduce splintering and delamination | Gelcoated surfaces, thin panels, or holes near an unsupported edge | Choose a sharp bit with a suitable point geometry; make a pilot hole if the final bit tends to wander. | Clamp the work securely, use a backing board on the exit side, and consider masking the surface before marking and drilling. |
| 6. Control speed, feed, and heat | Long drilling sessions, thick laminates, or repeated holes | Use a bit suitable for the material and drill with the hammer function turned off. | Use a controlled feed and a speed appropriate to the bit diameter and tool guidance. Pause if the bit or laminate becomes excessively hot. |
| 7. Consider wear and operator safety | Abrasive fiberglass dust, repeated production work, or overhead drilling | For frequent use, consider wear-resistant carbide-tipped tooling and verify that the bit is intended for the operation. | Wear eye protection, suitable respiratory protection, and protective clothing. Collect dust with appropriate extraction and follow the material and tool manufacturers’ safety instructions. |
Choosing the Right Bit Material, Design, and Size
Fiberglass rewards a controlled cut, not brute force. For a few holes, a sharp high-speed steel twist bit can work well. For frequent drilling, carbide often keeps its edge longer because glass fibers wear cutting edges quickly. Choose a clean, sharp bit; a dull one can fray the surface. Small details matter.
Match the design to the job. A standard twist bit suits many small holes, while a step bit can make larger openings in thin panels with less sudden grabbing. Avoid hammer action. Use steady pressure and moderate speed, since excess heat can soften resin or leave a rough rim. A scrap board behind the panel helps support the exit side. Not always possible, but worth trying.
Size the bit to the fastener and the clearance it needs. Check the measurement, then test on offcut material if available; fiberglass panels can vary in thickness and finish. Wear eye protection and a suitable dust mask, and collect dust rather than brushing it into the air. Even a carefully chosen bit cannot prevent every chip, especially near an unsupported edge. That limitation is easy to overlook.
Checking Compatibility With Your Drill and Workpiece
Check the drill’s chuck before choosing a fiberglass bit. Confirm that its shank fits securely and that the drill can run at a controlled speed. A snug fit alone is not proof of compatibility. For fiberglass laminate, switch off hammer mode; vibration can chip a brittle surface or delaminate thin layers. Variable speed helps when the bit first touches the workpiece. Fit matters.
Match the bit’s diameter and cutting style to the material, not just the hole size. A thin gelcoat over a soft core needs lighter pressure than a thick, solid laminate. Clamp the panel and place a scrap backing board beneath it to reduce breakout as the bit exits. If the workpiece flexes, pause and improve support. That extra setup can feel fussy, but it prevents rough holes.
Dust is real. NIOSH’s Pocket Guide to Chemical Hazards lists a recommended exposure limit for fibrous glass of 3 fibers/cm³ for specified fiber dimensions, and 5 mg/m³ for total dust. These are exposure benchmarks, not a guarantee that dust is harmless. Use local dust extraction, eye protection, and suitable respiratory protection; avoid blowing dust across the bench. One judgment call remains: older or coated panels may behave differently, so test the setup on an offcut when possible.
Using and Maintaining Fiberglass Drill Bits Safely
Before drilling, secure the fiberglass panel on a stable surface, with a backing board beneath it. Wear sealed eye protection, gloves, and a properly fitted particulate respirator. Dust travels. Use local dust extraction or good ventilation, and keep other people away from the work area. Choose a sharp bit suited to fiberglass and follow the tool maker’s speed guidance. Apply light, steady pressure; forcing the bit can create heat, rough edges, or surface damage. Pause if the panel becomes warm or the bit starts to wander. Small details matter.
After drilling, leave the tool unplugged before checking the bit. Look for chipped edges, dullness, or resin buildup, and replace a damaged bit rather than pushing through. Clean dust with a suitable HEPA-filtered vacuum or a damp cloth. Avoid blowing it away with compressed air or brushing it dry, since that can spread fine particles. I find cleanup easy to underestimate when planning a job. Store bits dry and protected, and handle the new hole’s edge carefully; even a clean cut can leave sharp fibers.
7 Tips for Choosing and Safely Maintaining Fiberglass Drill Bits
Use this interactive checklist when preparing to drill fiberglass. The chart shows which safety and maintenance steps you have checked off.
Each bar represents one checklist item: 0 means unchecked and 1 means checked. Completion is a checklist count, not a measurement of risk reduction or drilling performance.
