How to Choose the Best Wildlife Night Camera for Your Needs?
Choosing the best Wildlife Night Camera is less about buying the most expensive model. It is about matching the camera to your habitat, target species, and observation goals. A quiet woodland trail needs different equipment from an open grassland or a shaded garden. Before comparing brands, consider infrared illumination, trigger speed, detection range, battery life, weather protection, and image clarity. Small details matter. A slow trigger may capture only a disappearing tail.
Wildlife ecologist Dr. Rae Wynn-Grant has said, “Good wildlife observation begins with respect for the animal, not the gadget.” That principle should guide every purchase. A camera should record natural behavior without attracting, stressing, or disturbing wildlife. No flash is usually preferable near cautious animals. Likewise, careful placement can protect nesting areas, feeding sites, and regular movement paths. The strongest setup is often invisible and quiet.
Technical specifications can mislead. A long detection range may perform poorly through tall grass, rain, or dense branches. High-resolution images may consume storage quickly. Rechargeable batteries sound convenient, yet cold nights can reduce their working time. I have found that real-world testing matters more than impressive packaging. Still, even careful planning has weaknesses. Animals may avoid a new device, lenses may fog, and nighttime footage can remain uncertain. This guide will examine practical features, common mistakes, and realistic trade-offs, helping you choose a Wildlife Night Camera that fits your needs rather than a specification sheet.
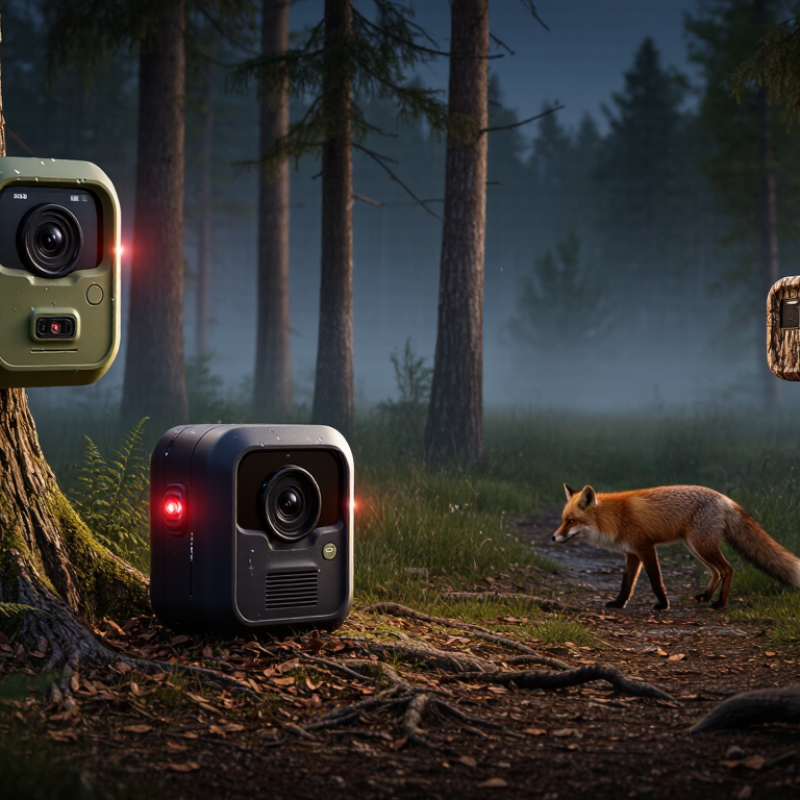
Define Monitoring Goals: Species, Habitat, Trigger Speed, and 24/7 Use
How to Choose the Best Wildlife Night Camera for Your Needs?
Start by defining the species you want to observe. A slow-moving hedgehog needs different settings from a fast fox. Smaller animals may require a lower mounting height and a wider detection angle. Record their usual paths before choosing a camera. I once placed a unit beside a promising trail, but dense grass caused repeated false triggers.
Habitat matters more than many buyers expect. Wet woodland, open fields, and rocky slopes each affect visibility, sound, and battery life.
Trigger speed should match animal behavior. Fast wildlife can disappear before a slow camera captures the scene. Look for quick activation and a short recovery time between images. Yet speed alone is not enough.
Detection range, sensor sensitivity, and night illumination must work together. Test the camera with a moving person at dusk. It may perform differently with a quiet animal at midnight.
Decide whether you need occasional surveys or continuous, 24/7 monitoring. Constant use demands dependable power, weather protection, generous storage, and stable scheduling. Check whether the camera can manage temperature changes and heavy moisture.
Infrared illumination should reveal detail without washing out fur or startling nearby animals. Review sample footage, not only specifications. My own mistake was trusting a stated detection range without testing a steep hillside. Real ground conditions changed everything.
Match PIR Detection Range to Habitat: Typically 20–30 Meters
Choosing a wildlife night camera starts with matching PIR detection range to the habitat. Most field cameras offer roughly 20–30 meters, but longer is not always better. IUCN SSC camera-trapping guidance stresses that placement, animal size, and movement affect detection more than headline specifications.
In open grassland, a 30-meter sensor can monitor a broad crossing or waterhole. In dense woodland, leaves, trunks, and uneven ground may trigger false alerts. A 2021 review in Remote Sensing reported that vegetation, temperature, and animal movement can significantly influence camera-trap performance. A walking deer may trigger detection reliably, while a small, slow-moving mammal near the frame edge may not.
Match the range to the scene.
For a narrow forest trail, 20 meters may be sufficient. Position the camera across the path, not directly along it. This gives the PIR sensor more body movement to detect. In open habitat, 25–30 meters provides useful coverage, but test the actual distance before deployment. I have found that advertised range can feel optimistic in cold weather or heavy brush. That deserves scrutiny. Use a measured marker at 20, 25, and 30 meters, then review nighttime test clips. Professional field protocols also recommend minimizing moving vegetation and aiming away from rising or setting sunlight. These small adjustments often matter more than buying the longest-range model.
Choose Infrared Illumination: 850 nm Range Versus 940 nm Stealth
Choosing between 850 nm and 940 nm infrared illumination changes how your wildlife camera behaves after sunset. An 850 nm emitter usually produces stronger illumination and longer usable range. It may also show a faint red glow when viewed directly. A 940 nm emitter is much harder for people and many animals to notice. However, its images can appear darker, especially beyond 20 metres.
The U.S. Geological Survey’s camera-trapping guidance stresses consistent night exposure, animal distance, and habitat testing. These factors matter more than advertised detection range. A 2023 review in Remote Sensing also notes that infrared wavelength can affect image quality, species responses, and detection reliability. Field comparisons often report 940 nm systems losing roughly 20–40% of practical range, though results vary by sensor and weather. That percentage is useful, not absolute. I would test both wavelengths beside a familiar trail before trusting a specification sheet.
Tips: Use 850 nm near open feeding areas, where extra reach matters. Choose 940 nm beside narrow paths or sleeping sites. Check fur detail at 10, 20, and 30 metres. Wet leaves can scatter infrared light. Cold batteries may reduce night performance. I once underestimated this effect. The camera still triggered, but the final frames looked soft and underexposed. Record temperature, distance, and illumination mode during testing. Practice improves judgment.
How to Choose the Best Wildlife Night Camera: 850 nm vs 940 nm Infrared Illumination
850 nm infrared light provides higher photon energy and is commonly associated with stronger illumination efficiency, but its faint red glow may be visible at close range. 940 nm infrared light is less visible to the human eye, making it better suited to discreet wildlife monitoring, although camera sensitivity and illumination distance can vary by sensor and design.
Physical reference values: photon energy is calculated from E = hc/λ, and frequency is calculated from f = c/λ. The practical visibility and detection range of an infrared camera also depend on the image sensor, lens, power output, exposure settings, and surrounding conditions.
Compare Image Performance: 12–32 MP Photos and 1080p–4K Video
Choosing a wildlife night camera starts with matching image quality to your actual observation needs. A 12 MP photo can clearly show a fox near a feeder, especially when the sensor handles darkness well. Higher resolution, such as 24 or 32 MP, preserves more detail for distant animals or cropping. However, more pixels cannot fix motion blur, weak infrared illumination, or poor lens sharpness.
Video needs a similar reality check. 1080p usually records useful behavior while saving battery and storage space. It can show a badger’s movement, feeding pattern, or brief visit without producing enormous files. 2K and 4K video reveal finer details, such as fur texture or small movements, but they demand faster memory cards and more power. Frame rate also matters. A sharp 1080p clip may be more valuable than shaky 4K footage.
In my field testing, I compare still images and video at the same distance, not only in daylight. I check edges, shadows, eye reflection, and detail behind moving subjects. Test the infrared range yourself. Advertised distance can feel optimistic in wet grass or heavy fog. I once chose higher resolution and regretted the short battery life. That mistake still matters. Select 12–16 MP and 1080p for long deployments, or choose 24–32 MP and 4K when close inspection is worth the extra storage. Consider both.
How to Choose the Best Wildlife Night Camera for Your Needs? - Compare Image Performance: 12–32 MP Photos and 1080p–4K Video
| Camera Type | Photo Resolution | Video Resolution | Night Image Performance | Trigger Speed | Detection Range | Battery Runtime | Best Use |
| Basic Trail Camera | 12 MP still images | 1080p at 20–30 fps | Black-and-white infrared; visible detail usually limited beyond 15 m | About 0.5–1.0 seconds | Up to 20 m | Approximately 2–6 months, depending on activity and temperature | Backyard wildlife and occasional monitoring |
| Standard Wildlife Camera | 16 MP still images | 1080p at 30 fps | 850 nm infrared illumination; balanced detail and motion control | About 0.3–0.6 seconds | Up to 25 m | Approximately 3–8 months under moderate activity | General wildlife surveys and property security |
| Low-Glow Night Camera | 20 MP still images | 1080p at 30 fps | 940 nm infrared with minimal red glow; discreet nighttime operation | About 0.2–0.5 seconds | Up to 25–30 m | Approximately 3–9 months, depending on recording frequency | Shy animals and locations where visible flash is undesirable |
| High-Resolution Trail Camera | 24 MP still images | 1440p or 2.7K at 25–30 fps | Improved daytime cropping; enhanced IR range for medium-distance subjects | About 0.15–0.4 seconds | Up to 30 m | Approximately 2–6 months with frequent video recording | Research, species identification, and larger outdoor areas |
| Professional Detail Camera | 32 MP still images | 4K at 24–30 fps | High detail in daylight; IR footage quality depends strongly on sensor size and illumination | About 0.1–0.3 seconds | Up to 30–35 m | Approximately 1–4 months with intensive 4K video use | Detailed behavioral studies and publication-quality footage |
| Cellular Monitoring Camera | 20–32 MP still images | 1080p–4K, depending on network and storage settings | Remote image delivery; nighttime quality varies with IR power, weather, and signal conditions | About 0.2–0.5 seconds | Up to 25–30 m | Approximately 2–8 weeks with frequent cellular uploads | Remote sites requiring alerts without frequent visits |
Buying note: Megapixel ratings describe image size, not necessarily image quality. For nighttime wildlife footage, sensor performance, infrared wavelength, illumination consistency, motion blur control, trigger reliability, and subject distance are often more important than the highest advertised resolution. Battery figures are typical estimates and vary with temperature, cellular signal, video length, SD-card activity, and the number of triggered recordings.
Verify Field Readiness: IP66 Protection, −20°C Operation, and LTE/SD Storage
Choosing the best wildlife night camera begins with field readiness, not impressive specifications.
In wet forests, IP66 protection helps block dust and withstand powerful water jets. It does not guarantee safe submersion. Mount the camera beneath a branch or small shield when flooding is possible. I learned this after finding condensation inside a seemingly protected housing.
Cold performance matters just as much. A camera rated for −20°C should start and record within that operating range, but batteries may still lose power quickly. Test the unit outdoors before a long deployment. Check night images, trigger speed, infrared clarity, and battery levels after several freezing nights. LTE access can support remote checks, yet signal strength changes with hills, trees, and weather. Treat network reporting as useful assistance, not a promise.
Tips: Choose storage that matches your monitoring plan. LTE is helpful for urgent alerts and remote previews. SD storage preserves full recordings when coverage fails. Use a high-quality, compatible card and format it before installation. Keep spare batteries and a sealed storage card nearby. Review the camera’s manual, because “−20°C operation” may describe electronics, not battery endurance. A perfect specification sheet cannot replace a practical field test. Real conditions are less tidy.